Buttery Sourdough Pull-Apart Rolls (Perfect for Thanksgiving Dinner)
It’s June in Arizona.
The temperature outside is hovering around 110 degrees, the air conditioner is working overtime, and most people are thinking about swimming pools, watermelon, and ways to avoid turning on the oven.
Naturally, I decided it was the perfect time to start testing recipes for Thanksgiving dinner.
If you’re new here, welcome to Crumb & Chaos, where perfectly reasonable decisions occasionally take a back seat to sourdough experiments.
One of my goals this year is to build a collection of family recipes made with simple, quality ingredients. Sometimes that means replacing boxed pancake mix with homemade sourdough pancakes. Sometimes it means experimenting with new sourdough breads. And sometimes it means making Thanksgiving rolls five months early while the Arizona sun is trying to melt everything outside.
Honestly, I’d rather discover what works now than scramble to test recipes in November.
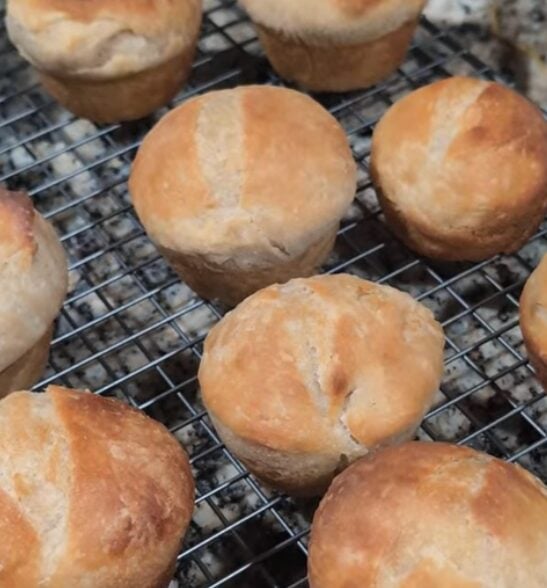
The result of this experiment was these buttery sourdough pull-apart rolls. Soft on the inside, golden on the outside, and rich without being heavy. They have just enough sourdough flavor to make them interesting while still being approachable for people who aren’t necessarily sourdough fanatics.
Even better, they pull apart beautifully and look right at home on a holiday table.
Why I Started Testing Thanksgiving Recipes Early
One thing I’ve learned since starting my sourdough journey is that the best recipes rarely happen on the first try.
Sometimes they’re close.
Sometimes they’re disasters.
Sometimes they become dinner anyway because nobody wants to waste ingredients.
And occasionally they turn into something worth making again and again.
When Thanksgiving arrives, I don’t want to be experimenting. I want to be spending time with family, enjoying the meal, and knowing everything will work exactly as planned. The day is busy enough without standing over a bowl wondering why my rolls came out dense or whether I should have used a different flour or whether the butter was too cold or too warm.
That means June is the perfect time to start testing.
Would these rolls benefit from more butter?
Would they work as an overnight recipe?
Would they reheat well for holiday meals?
Could they eventually become part of a Crumb & Chaos holiday menu?
Those are all questions I can answer now instead of trying to figure them out while juggling turkey, side dishes, desserts, and a house full of people. November Liz will thank June Liz for doing the legwork.
Meet Doughzilla
No sourdough recipe at Crumb & Chaos would be complete without mentioning Doughzilla.
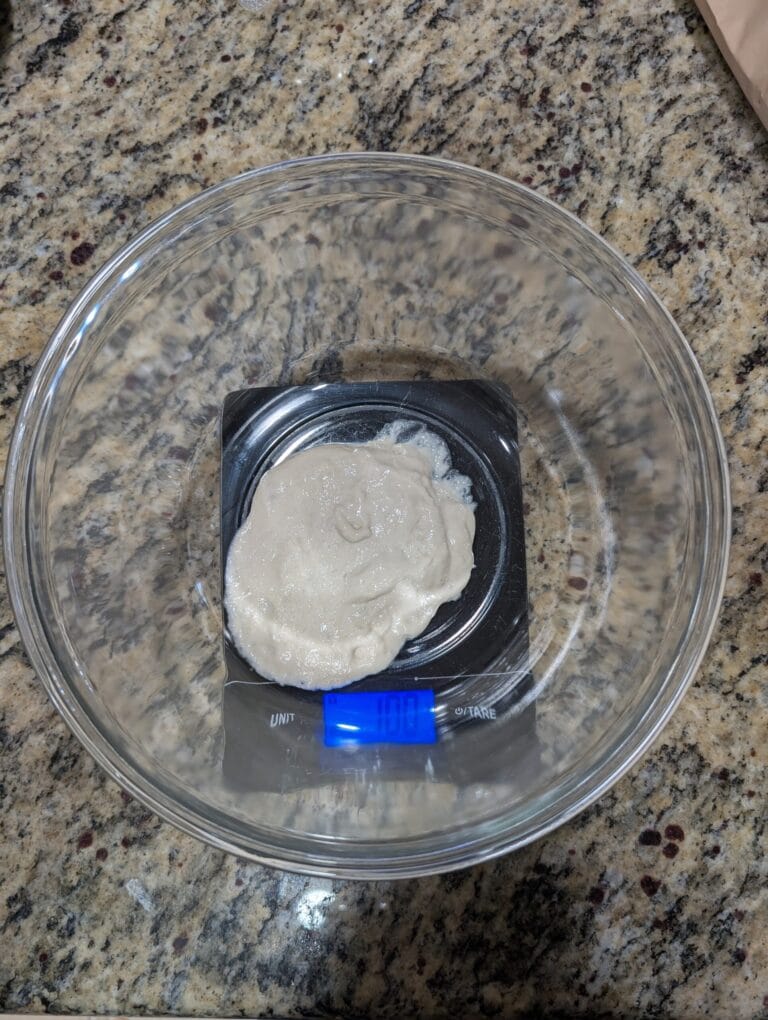
Doughzilla is my sourdough starter and the resident monster of this kitchen.
She spends her days eating flour, doubling in size, and occasionally making me question my life choices when she tries to escape her jar overnight.
For this recipe, Doughzilla was active, bubbly, and more than ready to work.
An active starter makes a huge difference in recipes like this. You want a starter that has been recently fed, is full of bubbles, and has roughly doubled within the last few hours. If your starter looks sluggish or has fallen back down after peaking, give it another feeding and wait a few hours before mixing your dough.
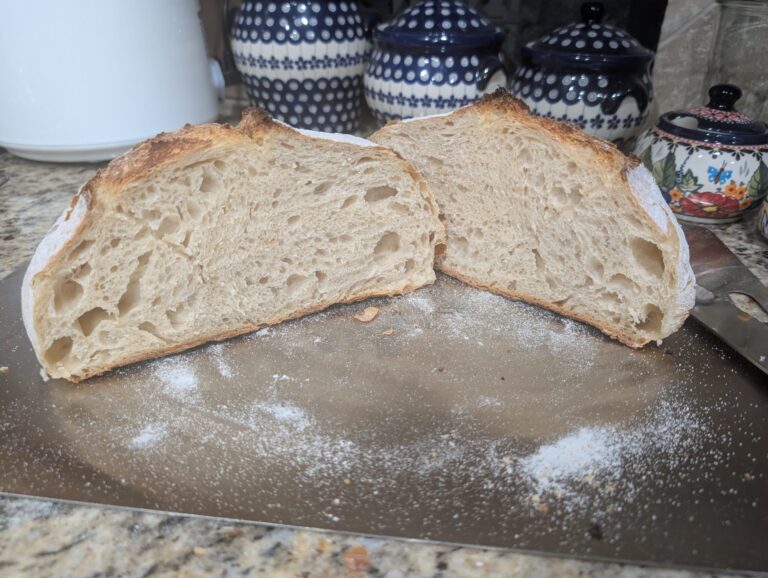
If you’re new to sourdough and not sure whether your starter is ready to bake with, my Simple Everyday Sourdough Bread recipe walks through the visual cues to watch for. The same active starter standard applies here.
Why These Rolls Are Different
I love traditional dinner rolls.
I love sourdough.
And I really love butter.
So naturally, I started wondering if I could combine all three without crossing into brioche territory.
I didn’t want something as rich as brioche, which would feel heavy next to a Thanksgiving plate already loaded with stuffing, mashed potatoes, and gravy. I didn’t want something as time-consuming as croissants, because nobody has time to laminate dough on a holiday morning. And I didn’t want a plain sourdough roll, because that felt like missing the point of making something special.
The answer ended up being grated butter.
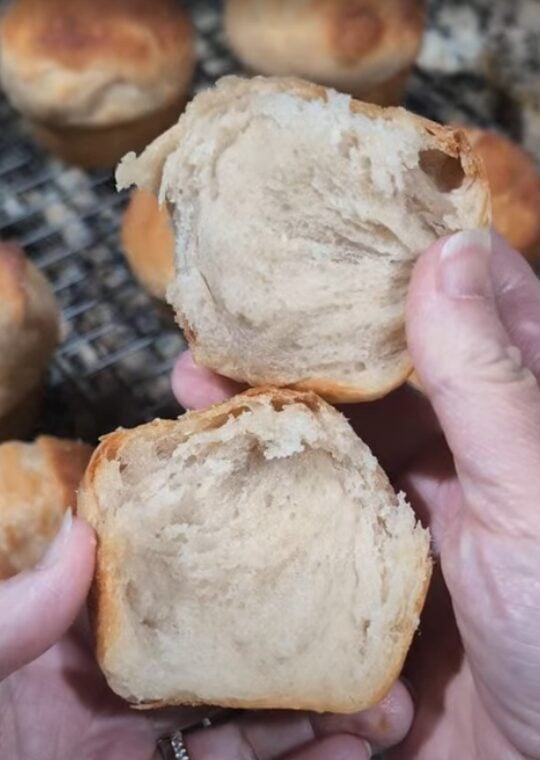
By folding grated butter into the dough during fermentation, little pockets of butter get distributed throughout the dough. As the dough rises and the rolls bake, those butter pockets melt and create soft, slightly flaky layers inside the rolls. It’s almost like a simplified version of laminating dough without any of the extra work.
The result is a roll that’s soft, flavorful, buttery, and perfect for holiday dinners.
Even better, the technique is approachable. If you can grate cold butter (you can) and fold it into a sourdough during stretch and folds (also yes), you can make these rolls. No special skills required.
Ingredients
Method
- In a large bowl, combine the sourdough starter and water. Mix until the starter is mostly dissolved.
- Add the flour and sprinkle the salt over the top. Mix until a shaggy dough forms and no dry flour remains. Cover and rest for 30 minutes.
- Perform two sets of stretch and folds, spaced 30 minutes apart. With a wet hand, stretch one side of the dough upward, fold over the top, rotate, and repeat on all four sides.
- Before the third stretch and fold, grate the chilled butter using a microplane or box grater. Add 15 grams of grated butter, fold the dough over itself, rotate the bowl, and add another 15 grams. Repeat until all 60 grams have been incorporated across four folds.
- Cover and bulk ferment until the dough has nearly doubled and feels soft and jiggly, about 3 to 8 hours depending on kitchen temperature.
- Lightly grease a standard 12-cup muffin tin (or a 9-inch round cake pan for pull-apart style). Turn the dough onto a lightly floured surface and divide into 12 equal portions, about 90-95 grams each.
- Shape each piece into a smooth ball by pulling the edges underneath to create surface tension. Place one in each muffin cup, seam side down.
- Preheat oven to 450°F. Bake the rolls uncovered for 5 minutes. Remove from oven and score the top of each roll with a simple slash.
- Return to oven and bake an additional 20 minutes, until deeply golden brown (internal temperature around 200°F). Cool in the pan 5 to 10 minutes before transferring to a wire rack.
Notes
What You Will Need
Nothing exotic. This is the same equipment most home bakers already use for bread.
- A large mixing bowl
- A kitchen scale (essential for accurate sourdough)
- A bench scraper for dividing the dough
- A microplane or box grater for the butter
- A standard 12-cup muffin tin (or a 9-inch round cake pan for pull-apart style)
- Cooking spray or a little extra butter for greasing
- A lame, sharp knife, or razor blade for scoring
I grated my butter directly into the dough using a microplane. The fine shreds incorporate beautifully and distribute evenly during folding. A box grater works too if a microplane isn’t what you have on hand. Whichever tool you use, the butter needs to be cold straight from the refrigerator so it grates cleanly instead of smearing.
This post may contain affiliate links. If you purchase through one of these links, I may earn a small commission at no extra cost to you. I only link to products I actually use in my kitchen. You can read my full affiliate disclosure here.
Ingredients
For the Dough
- 115 grams active sourdough starter (recently fed and at peak)
- 360 grams water, room temperature
- 500 grams bread flour (or all-purpose in a pinch)
- 11 grams fine sea salt
- 60 grams unsalted butter, grated and chilled
For the Pan
- Cooking spray or softened butter for greasing
A note on flour: I prefer bread flour for these rolls because the extra protein gives them better structure and a slightly chewier texture that holds up to all that butter. All-purpose flour will work and the rolls will still be delicious, just a touch softer overall. Whatever you use, weigh it. Sourdough is unforgiving when it comes to volume measurements.
Instructions
Step 1: Mix the Dough
In a large bowl, combine the sourdough starter and water.
Mix until the starter is mostly dissolved into the water. The mixture should look slightly cloudy and milky with small bubbles floating to the surface.
Add the flour and sprinkle the salt over the top.
Mix until a shaggy dough forms and no dry flour remains. You can use your hand, a wooden spoon, or a dough whisk. The dough will look rough and a little lumpy at this stage, which is exactly right.
Cover and allow the dough to rest for 30 minutes. This is called an autolyse, and it gives the flour time to fully hydrate while the gluten starts to develop on its own. No kneading required.
Step 2: Stretch and Folds
Perform two sets of stretch and folds, spaced 30 minutes apart.
To do a stretch and fold, wet your hand to keep the dough from sticking, grab one side of the dough, stretch it upward gently, and fold it over the top. Rotate the bowl 90 degrees and repeat until all four sides have been folded.
The dough will gradually become smoother and stronger with each fold. By the second set, you should notice it feels noticeably different from when you started.
Step 3: Add the Butter
Before the third stretch and fold, grate the chilled butter.
I used a microplane to grate the butter directly into the bowl, which produces fine shreds that incorporate quickly. A box grater also works.
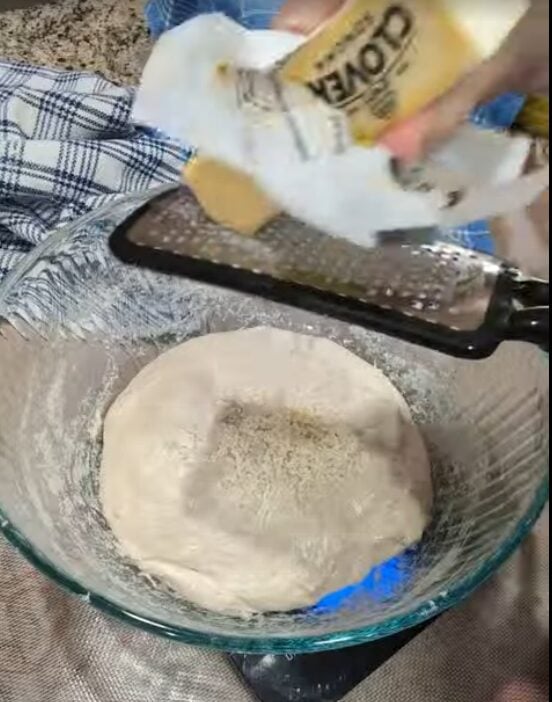
Add approximately 15 grams of butter to the dough.
Fold the dough over itself.
Rotate the bowl.
Add another 15 grams.
Repeat the folding process until all 60 grams of butter have been incorporated. By the end, you will have completed four folds with butter added at each.
Don’t worry if the butter isn’t perfectly distributed. The remaining fermentation time will help work it into the dough, and a little uneven distribution actually creates beautiful streaks of butter throughout the finished rolls.
Step 4: Bulk Fermentation
Cover the dough and allow it to ferment on the counter until it has nearly doubled in size and becomes soft and jiggly.
I always try to watch the dough more than the clock.
Depending on the temperature of your kitchen and the activity of your starter, this timing can vary significantly. In a warm Arizona kitchen with an active starter, this might take 3 to 4 hours. In a cooler kitchen or with a less vigorous starter, it could easily take 6 to 8 hours.
Look for these signs that bulk fermentation is done:
- The dough has visibly grown by about 75 to 100 percent
- The surface looks domed and slightly bubbly
- The dough feels light and airy when you tilt the bowl
- A poke with a wet finger springs back slowly
Step 5: Shape the Rolls
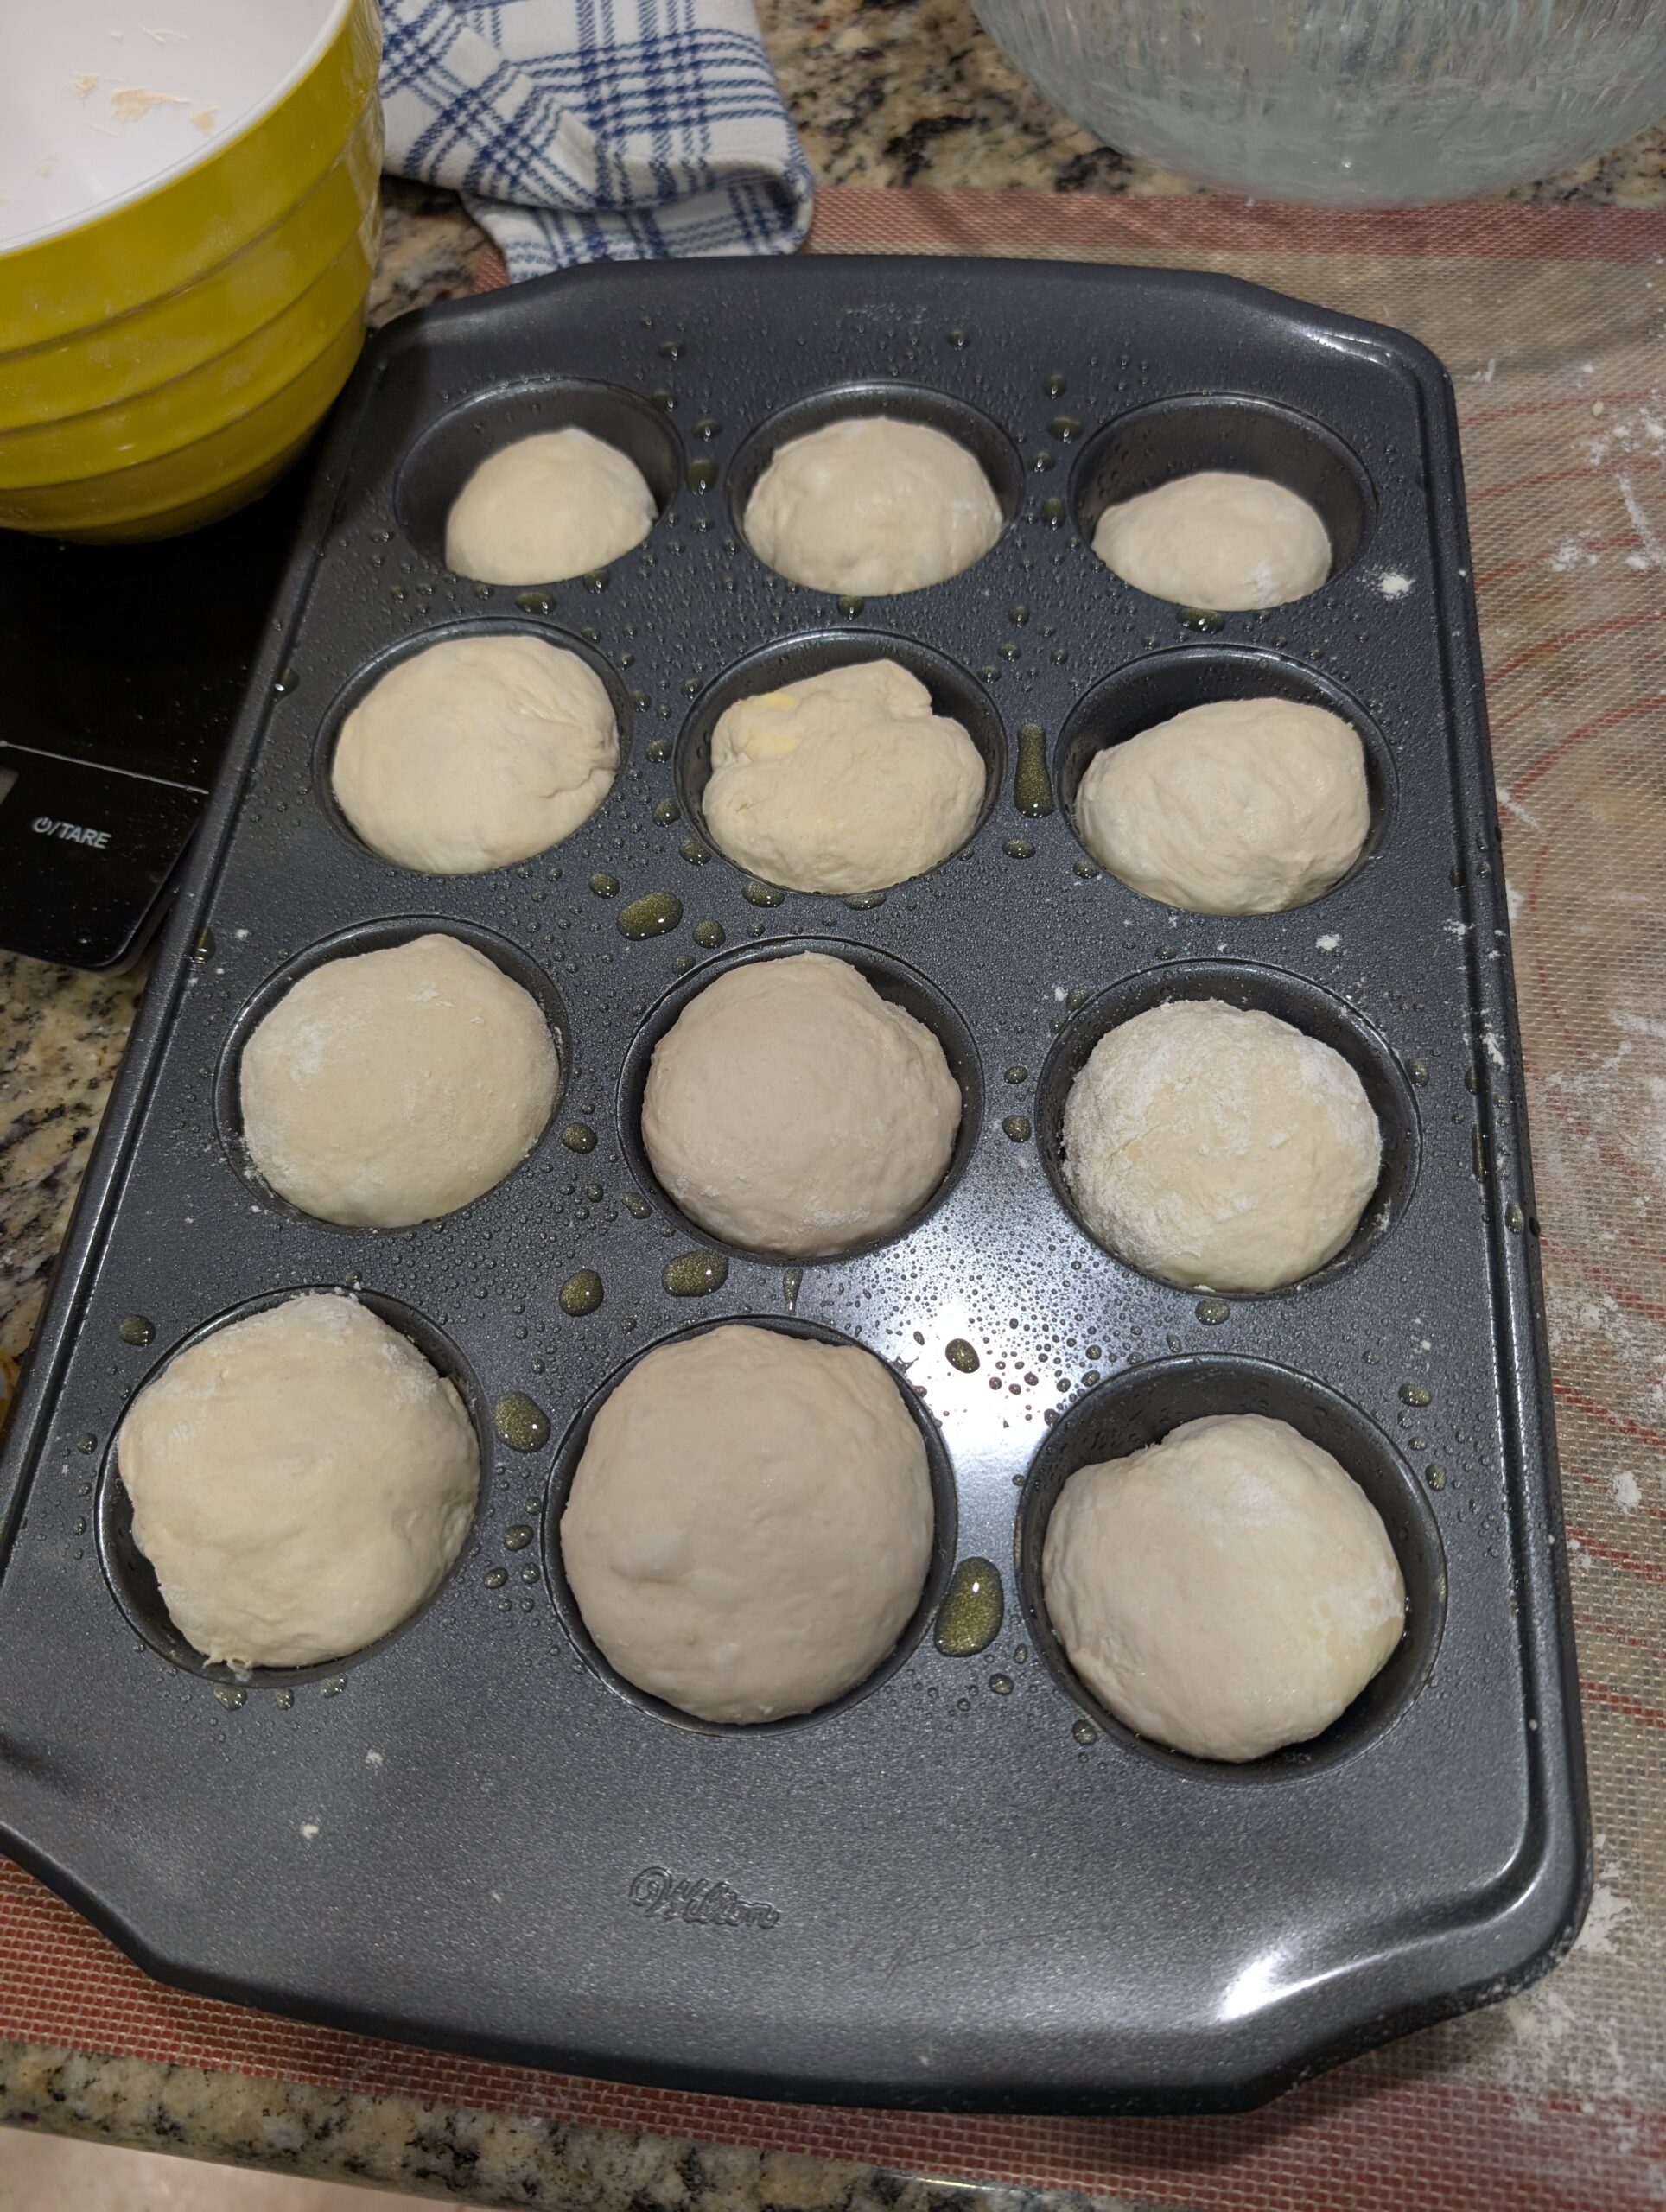
Lightly spray a standard 12-cup muffin tin with oil.
Turn the dough onto a lightly floured surface and divide it into 12 equal portions. If you want them perfectly even, use a kitchen scale. Each piece should weigh roughly 90 to 95 grams.
Shape each piece into a smooth ball by pulling the edges underneath to create surface tension. The smoother the top of the ball, the prettier the finished roll.
Place one roll into each muffin cup, seam side down.
Step 6: Bake
Preheat the oven to 450 degrees Fahrenheit.
These rolls bake best uncovered, which lets the tops develop a beautiful golden crust.
Bake for 5 minutes.
Remove the pan and quickly score the top of each roll with a simple slash using a sharp knife, razor, or lame. The score helps the rolls expand evenly and adds a beautiful detail to the finished tops.
Return the rolls to the oven and bake for an additional 20 minutes, or until deeply golden brown on top. The internal temperature should be around 200 degrees Fahrenheit if you want to be precise.
Allow the rolls to cool in the pan for 5 to 10 minutes before transferring them to a cooling rack.
Resist the urge to dive in immediately. The texture continues to set as they cool, and a piping hot roll straight from the oven can be slightly gummy in the center.
Tips for the Perfect Buttery Rolls
A few small things make a big difference with this recipe.
- Use cold butter. Room temperature butter smears instead of grating cleanly, which means you lose the layered effect. Pull your butter straight from the refrigerator right before you grate it.
- Weigh your ingredients. Sourdough recipes are calibrated to specific weights. Using cups for flour can easily throw off the hydration and give you dense rolls.
- Watch the dough, not the clock. Fermentation times depend on temperature and starter activity. Look for visible signs (size, surface, jiggle) instead of trusting a timer.
- Don’t skip the score. It looks decorative, but it actually helps the rolls bake evenly and prevents random cracking.
- Let them cool a few minutes. The interior crumb sets as the rolls cool. Cutting in too soon can give you a slightly gummy texture.
- Brush with melted butter after baking. If you want extra-shiny, extra-buttery tops, brush each roll with melted butter as soon as it comes out of the oven.
Muffin Tin or Pull-Apart Style
This recipe works two ways depending on the look you want.
Muffin tin (my preferred method): Each roll bakes in its own cup, which gives you crispy golden edges all the way around. Easy to portion, easy to grab, and they release cleanly from the pan. Best for serving on individual plates or piling into a bread basket.
Pull-apart style: Place the shaped rolls in a greased 9-inch round cake pan or 9-inch square baking dish so they are just touching. As the rolls bake and rise, they fuse together, creating soft pull-apart sides where they touched and golden tops where they did not. Best for serving family-style at the table where everyone can pull off their own roll.
Both methods use the same recipe. The only thing that changes is the pan and the look of the finished rolls.
Make Ahead and Storage
Holiday cooking is hard enough without trying to time fresh-baked rolls perfectly. Here are a few make-ahead options I have either tested or plan to test before November.
Overnight cold proof: Shape the rolls and place them in the greased muffin tin or baking dish. Cover and refrigerate overnight (8 to 16 hours). The next morning, let them come to room temperature for about an hour while the oven preheats. Bake as directed. This is my goal method for Thanksgiving.
Same-day with a head start: Mix and bulk ferment the dough the day before, then refrigerate the bulk-fermented dough overnight. Shape, do a short final proof, and bake the next day. This breaks the recipe into a manageable two-day project.
Bake ahead, reheat for serving: Bake the rolls fully, cool completely, and store at room temperature in an airtight container for up to 2 days. To reheat, wrap the rolls in foil and warm at 300 degrees Fahrenheit for 8 to 10 minutes. They will not be quite as good as fresh, but they are close.
Freezer storage: Cool baked rolls completely, then freeze in a zip-top bag for up to 2 months. Thaw at room temperature and reheat in foil at 300 degrees Fahrenheit for 10 to 12 minutes.
I will be testing all of these between now and Thanksgiving and updating this post with what works best.
Serving Suggestions
These rolls are perfect for:
- Thanksgiving dinner
- Christmas dinner
- Easter meals
- Sunday family dinners
- Soups and stews
- Leftover turkey sandwiches
Or simply warm from the oven with a generous amount of butter.
Because let’s be honest, fresh bread rarely needs much help.
For a Thanksgiving-specific spread, these rolls go especially well alongside:
- Roast turkey with herbed butter
- Buttery mashed potatoes
- Cranberry sauce
- Sausage and herb stuffing
- Green bean casserole or roasted brussels sprouts
- Sweet potato casserole
The slight tang from the sourdough cuts through the richness of all those holiday sides without competing with them. They also make the best next-day leftover turkey sandwich you will ever eat.
Frequently Asked Questions
Can I make these without sourdough starter?
Not directly, since the starter is the leavening for this recipe. If you want a similar style of buttery dinner roll without sourdough, you will need a recipe built around commercial yeast.
Can I use whole wheat flour?
You can substitute up to 20 percent of the bread flour with whole wheat for added flavor and a slightly denser texture. Going beyond that will give you a heavier roll that loses some of the soft, buttery quality.
Why grated butter instead of softened butter?
Grated cold butter creates distinct pockets in the dough that melt during baking, producing soft layered interiors. Softened butter just blends in and changes the dough’s hydration, which gives you a more uniform texture (good for some things, not what we want here).
What if I don’t have a microplane?
A box grater works fine. Use the largest holes and keep the butter very cold so it grates cleanly. If you do not have either, you can also slice the butter into very thin pieces with a knife. Not quite as elegant, but it gets the job done.
Can I add herbs or garlic?
Absolutely. Mince fresh rosemary, thyme, or chives and fold them in along with the butter during the stretch-and-fold stage. Roasted garlic also works beautifully for a savory dinner roll variation.
Why are my rolls dense?
Almost always a sign of under-fermentation. The dough needed more time during bulk ferment. Next time, watch for the visible signs (75 to 100 percent volume increase, domed surface, jiggly when you tilt the bowl) instead of strictly timing it.
Can I double the recipe?
Yes, though you will need two muffin tins or one muffin tin and a baking dish. The recipe scales linearly.
Future Tests and Thanksgiving Planning
One thing I love about baking is that recipes are rarely ever truly finished.
This version was a huge success, but I already have a few ideas for future tests before Thanksgiving arrives.
More Butter
The grated butter worked beautifully, but I may experiment with increasing it to 75 to 90 grams to see if I can create an even richer roll without sacrificing structure.
Slightly Shorter Bake Time
The rolls developed a beautiful golden crust, but I may test shaving a few minutes off the final bake time to keep the interior even softer.
Overnight Proof
One of my biggest goals is finding a way to make these as Thanksgiving-friendly as possible.
I’d love to shape the rolls the night before, refrigerate them overnight, and bake them shortly before dinner so they’re piping hot when they hit the table.
Reheating Test
Holiday cooking is stressful enough.
I’d also like to test baking these ahead of time and reheating them before serving.
If they reheat well, they may eventually become part of a future Crumb & Chaos holiday menu.
Having a reliable make-ahead option would be a huge win for busy holiday cooks.
Final Thoughts
For a recipe tested in June while it was 110 degrees outside, I’d call this one a success.
The rolls were soft, buttery, flavorful, and exactly the kind of bread I want sitting next to a Thanksgiving plate.
Will they make the final Thanksgiving menu?
At this point, I think the answer is yes.
Of course, there will be more testing between now and November. That’s part of the fun.
For now, Doughzilla and I are calling this experiment a win, and we’ll continue working our way through holiday recipes one loaf, roll, and sourdough experiment at a time.
If you’re new to sourdough and looking for a starting point, my Simple Everyday Sourdough Bread recipe is a great place to begin. And if Saturday breakfasts are more your speed, my fluffy sourdough pancake recipe is the one my whole family asks for on repeat.
Want to know more about why I bake the way I do or how this whole blog got started? Read my full story here. Or browse From the Kitchen for more real-life sourdough recipes.
Happy baking, friends.